A boy, a jar, and a tree.. the makings of a fun afternoon
Showing posts with label crafts. Show all posts
Tuesday, December 6, 2011
Friday, December 2, 2011
Fa la la la la
I made a wreath! Thanks to an incredible Black Friday weekend sale at Michael's, I bought all my supplies for under $10.
I couldn't believe the sales they were having or that by Sunday night the store wasn't very picked over. And since two things make me very happy-- a great deal and a craft project that turns out-- it made my holiday and made up for the long lines at the mall the day before.
The ribbon is glued, but the rest is able to be taken out if i decide to decorate differently next year.
Here's the rough break down:
Wreath: $4
Berries (cut from one stem): $1
White twirly sticks: $1 for a bag
Ribbon: $2 for this piece
Gold ball bunch: $0.89
Tomorrow? Off to spend my JC Penny coupon for $10 off a purchase of $10 or more.
Wednesday, October 26, 2011
Make washable baby wipes-- an easy tutorial
I was recently shopping in a cloth diaper store and came accross some washable baby wipes. They were made from various materials and said you could use them with wipe solution or just spritz with a spray bottle.
They seemed easy enough to make myself so I set out to sew a few to try at home. (I believe retail was around $15 for four?)
Here are the instructions for making the ones above.
What you will need:
A sewing machine
Material (I used old burp cloths. It needs to be soft but absorbant.)
Scissors
I found a small square box and traced around it as my pattern. Then, after trying a few techniques, I stitched two squares together in a zig zag setting on the sewing machine. (May I mention that this was done on probably the coolest antique sewing machine I've ever seen? Our neighbor invited us over to use it-- they're in their 80's-- and found it in Germany. They travelled with it all over Europe by train and brought it back to the states many years ago.)
We tried two ways to stitch the pieces together, one was starting inside out and then finishing it with the seams on the inside, like a pillow. This made it not lay flat though so we simply stitched along the top of the two pieces paired up.
After the first washing, my initial wipes began to fray so we solved this by cutting along the edge of the next set of wipes with pinking shears. It left the edges finished enough that they no longer frayed.
I've tried them on my not-yet-potty-trained two-year old and on my newborn. I like them on my older son for less messy diapers, but I LOVE using them on the newborn. He goes through a lot of diapers during the day and the washable wipes seem less irritating to his skin. They also aren't cold so don't make him cry during changings. We just toss them in a washable bag that hangs by the changing table and put them in with a load of washable diapers.
They seemed easy enough to make myself so I set out to sew a few to try at home. (I believe retail was around $15 for four?)
Here are the instructions for making the ones above.
What you will need:
A sewing machine
Material (I used old burp cloths. It needs to be soft but absorbant.)
Scissors
I found a small square box and traced around it as my pattern. Then, after trying a few techniques, I stitched two squares together in a zig zag setting on the sewing machine. (May I mention that this was done on probably the coolest antique sewing machine I've ever seen? Our neighbor invited us over to use it-- they're in their 80's-- and found it in Germany. They travelled with it all over Europe by train and brought it back to the states many years ago.)
We tried two ways to stitch the pieces together, one was starting inside out and then finishing it with the seams on the inside, like a pillow. This made it not lay flat though so we simply stitched along the top of the two pieces paired up.
After the first washing, my initial wipes began to fray so we solved this by cutting along the edge of the next set of wipes with pinking shears. It left the edges finished enough that they no longer frayed.
I've tried them on my not-yet-potty-trained two-year old and on my newborn. I like them on my older son for less messy diapers, but I LOVE using them on the newborn. He goes through a lot of diapers during the day and the washable wipes seem less irritating to his skin. They also aren't cold so don't make him cry during changings. We just toss them in a washable bag that hangs by the changing table and put them in with a load of washable diapers.
Friday, September 30, 2011
Sunday, September 4, 2011
Baby room preview: Before and after makeover
We finished the baby room!
Here's a before and after of the new room for our little one. I love how it turned out, especially since I got everything to put it together before we moved in so it was the first time to see how it would look.
Here's the room before...
And here is what it looks like now...
I made the mobile, quilt, and rug which I think gives it a more personal touch.
It's good to be settling in and making the house our own.
Here's a before and after of the new room for our little one. I love how it turned out, especially since I got everything to put it together before we moved in so it was the first time to see how it would look.
Here's the room before...
And here is what it looks like now...
I made the mobile, quilt, and rug which I think gives it a more personal touch.
It's good to be settling in and making the house our own.
Friday, August 19, 2011
Happiness is a bargain and laundry detergent making 101
This morning on our way to run errands, I stopped at a few garage sales. At one moving sale I found my latest project-- a mirror from the 50's with a funky frame and shelves. I'd never seen anything like it before and bought it for just $10!
After a little ivory spray paint to cover the original flaking gold coat ($3.25 at Walmart), this is what it turned out like.
For a total of $13.25, I now have another fun piece for the baby's room.
My next project for the day was to try making my own laundry detergent. I'd been reading different recipes for detergent and decided the three ingredient ones were the easiest.
I mixed 2 bars of Fels Naptha soap (in the laundry aisle) by grating it with a cheese grater, 2 cups of Washing Soda, and 2 cups of Borax. I stirred it all together and stored it in a tupperware container with a small scoop.
You will have extra Borax and Washing Soda left over for the next batch and it only takes 1 Tablespoon to wash one load of laundry! In all, I believe the total was around $5 (including the generous amounts of the two ingredients left over).
Tuesday, August 16, 2011
Stencil rug = Success!
After a few failures, I'm proud to show off my new personalized rug!
Giving an old rug a facelift proved to be easier than I expected-- once I found a good dying technique. The hardest part of the project was finding a way to dye the rug so it would keep it's color. I purchased two cotton rugs last weekend from a garage sale to try this, but I think this one may have had a stain guard that kept the dye from taking easily.
To make my rug, I first soaked it in a 50/50 water and bleach solution. It didn't take long since the rug was originally an off-white. I then put it through the washer and left it slightly damp to help take the dye better.
I decided to put the dye in a plastic tub I purchased specifically for this project. It was on clearance and would save our bath tub from any unsightly staining. I then soaked the rug for about 10 minutes in one packet of gray RIT dye. After it was the color I liked, I rinsed it in the sink and put it through the wash without any soap. Unfortunately, the rug quickly went back to it's original color.
Attempt #2. I had already thrown out the RIT dye, so I decided to try a homemade dye. I looked up natural dying techniques but getting a true gray was going to be very difficult. I didn't want a red rug (using wine, grape juice, or food coloring), so I opted for a shade of brown. I brewed a strong pot of coffee, added some vinegar, and let it soak for about an hour. That didn't quite get it dark enough.
Attempt #3. So I brewed another pot of coffee, added more vinegar this time, and left it soaking overnight. In the morning, I let it dry before sending it through the rinse cycle of the washer. After it was rinsed, I hung it outdoors to dry again.
Success! I came out with the perfect shade. Once the rug had dried, I took a stencil and white fabric paint and made my design.
I love my new rug and even have the second rug (my backup since this was my first attempt) to make another.
Giving an old rug a facelift proved to be easier than I expected-- once I found a good dying technique. The hardest part of the project was finding a way to dye the rug so it would keep it's color. I purchased two cotton rugs last weekend from a garage sale to try this, but I think this one may have had a stain guard that kept the dye from taking easily.
To make my rug, I first soaked it in a 50/50 water and bleach solution. It didn't take long since the rug was originally an off-white. I then put it through the washer and left it slightly damp to help take the dye better.
I decided to put the dye in a plastic tub I purchased specifically for this project. It was on clearance and would save our bath tub from any unsightly staining. I then soaked the rug for about 10 minutes in one packet of gray RIT dye. After it was the color I liked, I rinsed it in the sink and put it through the wash without any soap. Unfortunately, the rug quickly went back to it's original color.
Attempt #2. I had already thrown out the RIT dye, so I decided to try a homemade dye. I looked up natural dying techniques but getting a true gray was going to be very difficult. I didn't want a red rug (using wine, grape juice, or food coloring), so I opted for a shade of brown. I brewed a strong pot of coffee, added some vinegar, and let it soak for about an hour. That didn't quite get it dark enough.
Attempt #3. So I brewed another pot of coffee, added more vinegar this time, and left it soaking overnight. In the morning, I let it dry before sending it through the rinse cycle of the washer. After it was rinsed, I hung it outdoors to dry again.
Success! I came out with the perfect shade. Once the rug had dried, I took a stencil and white fabric paint and made my design.
I love my new rug and even have the second rug (my backup since this was my first attempt) to make another.
Saturday, August 13, 2011
Babies wear suspenders
I recently came across this idea for personalizing a baby onsie by adding suspenders! The idea came from HERE and inspired me to try my hand at some of my own.
I'd love to try applique techniques, but need to find more information to guide my first attempt. What I like about these are that they seem more sturdy than personalized onesies with iron-on designs. Those seem to come loose fairly quickly.
If you have other ideas for making your own onsie, feel free to pass it along.
This one has my version of a bow tie.
For security, I used fabric glue and then double stitched everything. You can never be too careful with wearables that also endure multiple washes.
I'd love to try applique techniques, but need to find more information to guide my first attempt. What I like about these are that they seem more sturdy than personalized onesies with iron-on designs. Those seem to come loose fairly quickly.
If you have other ideas for making your own onsie, feel free to pass it along.
Monday, August 8, 2011
Make-it-yourself baby mobile
So last week I gave a little teaser by sharing the fabrics I was using for a new project. After a few test runs, I finally made a mobile for the baby's room. Here's where I got the idea.
The fun patterns certainly caught Maddox's eye and he wants to play with it!
I'm not very skilled with glue, so I sewed the hanging strands around the rim of the mobile by hand. I also added buttons on the bottom circles to help weigh it down and add a little extra cuteness. I toyed with the idea of also putting buttons around the rim of the mobile but decided it would be too much going on.
I plan to hang it up with more brown ribbon, a little chain, and a hook.
Friday, August 5, 2011
Toddlers love velcro blocks
This week I came across an idea for putting velcro on building blocks from Chasing Cheerios. I'm always looking for ways to occupy my busy toddler and blocks are one of his favorite things to play with.
Not only does the velcro allow him to build in new dimensions, but you can always add new shapes to keep their creativity flowing.
When I couldn't find regular building blocks at the craft store, I picked up plain wood square blocks and a bag of wooden spools for $2 each. I then chose red and blue velcro. A small glue gun gave the velcro the sticking power to resist the pull of the velcro, but if you try it make sure the corners are well glued to keep them stuck on tight. A few came loose and needed to be re-glued more securely.
As mothers know, toys like blocks end up scattered all over the room and always end up underfoot. So I found the perfect storage solution with a cute canister on clearance. My little one loves taking the lid on and off and has done a great job keeping his new block set picked up.
Actually, he loves the blocks and canister so much that he won't let me touch them. When I asked if I could see them, Maddox stated very matter-of-factly "No, my blocks!"
"His" blocks were even tucked securely under his arm tonight while watching his Veggie Tales movie (so mom wouldn't put them somewhere) and I'm sure would have gone to bed with him had I allowed it.
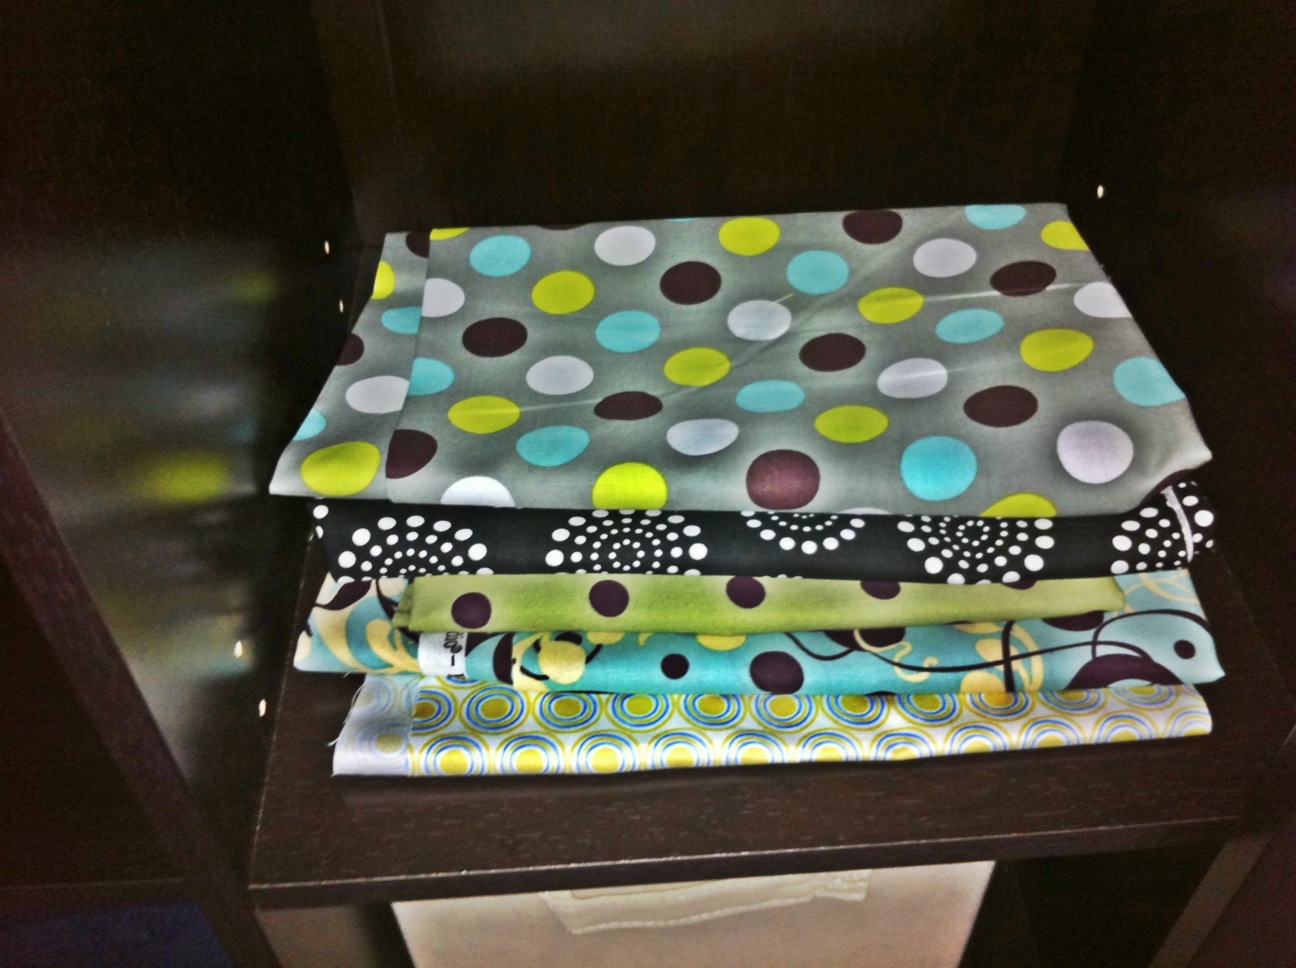
My next project is almost done and will be for the baby. I won't tell you what it is yet, but will give you a peek at the great fabrics I'm using.
Not only does the velcro allow him to build in new dimensions, but you can always add new shapes to keep their creativity flowing.
When I couldn't find regular building blocks at the craft store, I picked up plain wood square blocks and a bag of wooden spools for $2 each. I then chose red and blue velcro. A small glue gun gave the velcro the sticking power to resist the pull of the velcro, but if you try it make sure the corners are well glued to keep them stuck on tight. A few came loose and needed to be re-glued more securely.
As mothers know, toys like blocks end up scattered all over the room and always end up underfoot. So I found the perfect storage solution with a cute canister on clearance. My little one loves taking the lid on and off and has done a great job keeping his new block set picked up.
Actually, he loves the blocks and canister so much that he won't let me touch them. When I asked if I could see them, Maddox stated very matter-of-factly "No, my blocks!"
"His" blocks were even tucked securely under his arm tonight while watching his Veggie Tales movie (so mom wouldn't put them somewhere) and I'm sure would have gone to bed with him had I allowed it.
My next project is almost done and will be for the baby. I won't tell you what it is yet, but will give you a peek at the great fabrics I'm using.
Feeling craft-y? Do-it-yourself artwork
This week has been inspiring. I tackled multiple do-it-yourself projects and crafts that I'll share in the next few posts.
I admit that part of the motivation came from moving/house-shopping stress coupled with the physical and mental drain of weekend trips to Knoxville (this will be my third weekend making the drive and I'll be working on Sunday). The other side to the story is that I've been in tremendous pain this week and keeping busy helps take my mind off of it. The doctors are working hard to help me find some relief, but mostly it's just the unfortunate side of pregnancy symptoms.
Yesterday evening I had a great shopping trip to Hobby Lobby. I almost forgot how much I LOVE that store. The prices are lower that JoAnne's and it's much more convenient to our house.
I found a fantastic roll of fabric for 30% off. I then found this adorable frame for 50% off. By combining the two, I created a great piece of artwork for our bathroom.
And look how well it matches the rest of the bathroom!I am in love with the look so much that I'm considering making a collection of small framed fabrics and mixing in some photographs for the kids room, or framing three other fabrics I love and hanging them over the master bed.
Wednesday, August 3, 2011
Bibs, booties, and... a hand-stitched quilt
The quilt I started is finally done. I love that it incorporates the room colors but isn't so baby-ish that it has to be put away as he grows.
I picked out the fabric for the smaller squares from furniture sample pieces on clearance. The backing is more of a muslin fabric and very soft.
Instead of doing quilting, I decided to add buttons in corresponding blue, green, and cream. And while it doesn't make for a baby-safe quilt, it will be more for decoration anyway. Since it's hand-stiched I'd hate to have to wash it if it got dirty from use. My squares and grid aren't as perfect as I wanted, but I still like how it turned out as a shabby chic handmade project.
Wednesday, July 27, 2011
A history of quilts
Quilts seem to be knit into our family. In a vintage suitcase in my closet are three quilts intricately stitched by my grandmother and great-grandmother. I take them out and smell the scent of the antique hands that lovingly pieced each together. I hope one day to display them by hanging them from hooks on the wall, but for now they're in safe keeping.
Back in high school I resurrected the tradition of hand quilting by making a windmill quilt. I sewed and quilted the entire piece by hand which took three years and a LOT of patience. Most of it was done while visiting our cabin in the woods where there is no television and few distractions so crafts were easier to tackle. At one time my quilt served as the bedspread for our guest room, but it too is tucked away right now.
Here's a photo of my hard work. I made it to fit a standard size or twin bed.
Back in high school I resurrected the tradition of hand quilting by making a windmill quilt. I sewed and quilted the entire piece by hand which took three years and a LOT of patience. Most of it was done while visiting our cabin in the woods where there is no television and few distractions so crafts were easier to tackle. At one time my quilt served as the bedspread for our guest room, but it too is tucked away right now.
Here's a photo of my hard work. I made it to fit a standard size or twin bed.
Now that my second son is on the way, I've decided to make another quilt by hand. Below is a photo of the fabrics I chose. My quilting may be a little rusty and I may not have as much free time as pre-child number one, but I think it will work well in the boys room.
Friday, April 15, 2011
Summer Kids Crafts: Pine cone bird feeders and personalized stepping stones
Spring and Summer are the perfect times of year to start an outdoor craft project. Kids love learning new things and creating usable crafts.
The following simple crafts are both inexpensive and perfect for young children. A little imagination can go a long way on a warm afternoon.
Pine Cone Bird Feeder
Gather together:
Smooth peanut butter
1-2 Pine cones
String or twine
A pan of bird seed
A spoon for spreading
Line an outdoor table with newspaper and set out your supplies. Tie a 2 foot piece of string to the top of the pine cone. Let the kids slather the pine cone with peanut butter and roll it in the bird seed. Allow to dry for a few hours before hanging up for the birds to enjoy!
Stepping Stones
Stepping stone kit
Tiles, stones, beads
Thin wood dowel for writing
Handi-wipes for quick cleanup
Most craft stores sell inexpensive stepping stone kits. All you need to do is mix the cement according to directions (ours was slightly too moist so we let it sit for 30 minutes in the sun before decorating). Create your own designs with handprints, footprints, mosaics, glass stones, and beads. You can use a wood dowel to draw and write a name or spell it out in beads. Allow to dry one day before removing from the mold. Most kits come with enough mix to make more than one stepping stone.
Last summer Maddox and I made a stepping stone for the garden with his handprint and Henry's pawprint. The two buddies created a cherished momento we can enjoy for years to come.
Subscribe to:
Posts (Atom)