A boy, a jar, and a tree.. the makings of a fun afternoon
Showing posts with label motherhood. Show all posts
Tuesday, December 6, 2011
Saturday, November 19, 2011
Thursday, November 10, 2011
Waste not, my friends
I hate waste. This includes wasted food (when you order too much and don't bother to take it home or buy more food than you can eat before it spoils), wasted time, and wasted resources.
Right now I'm talking just about the waste that pollutes our planet and gets hauled out to the curb where we want to think it "magically" disappears. This is the wasteful society we've adapted to living in. It's a mind set where people feel entitled to doing things the way they want to and using the products they want to when a simple alternative would be less harsh on the environment. America is in love with her bad habits.
I've lived in a few environmentally-aware communities over the years and have developed habits that now come naturally to me. So natural that when I see other alternate practices I've since turned from, it makes me cringe. Sometimes, it makes me angry.
Here are a few examples.
To me, it just makes sense not to use paper products. I keep drawers of towels and rags on hand for different purposes. When my family wipes our hands, we use a towel. When you make a spill, you grab a rag. When I clean, I use an old t-shirt. Paper towels don't exist in my world. Because they aren't necessary.
I know it's a big step for most moms, but I've transitioned to mostly using cloth diapers and using washable wipes on the baby. I feel better about the decision and don't feel it's any more work, and saves us a lot of money every month. Besides, I never run out!
I don't take shopping bags. One of my good friends gifted me with a purse-size bag full of re-usable shopping bags. The product is genius and always on hand so I don't forget at the check-out line. What I find exceptionally irritating though is when I hand one over to a chashier and she proceeds to THROW AWAY the bag I'd be saving. There are items like meat products that I bag in plastic, or times a plastic bag will make it home with me. These are used as garbage liners, pet waste recepticles, and for dirty diapers on the go.
While I applaud the efforts of so many people who recycle religiously, or not so frequently, recycling just isn't the "end all." It's time to take a closer look at the waste in our lives. Recycling is just a small attempt to solve our waste issue. What we need to evaluate are those tricky little habits of convenience that wreak havoc on our planet and continue to be dumped into our landfills.
That's not to assume I see myself as in any way superior. I certainly still have a lot of things I could do differently.
I love my car just as much as the next person. I don't think twice about hopping behind the wheel for the slightest reason and zipping around town. I'm not ready to give up my daily drives or my SUV that's far from low emissions.
Unlike the neighbors, our house doesn't have solar panels. We don't raise our own chickens. Right now we don't even have a garden. (Yes, these neighbors do have a no emissions vehicle parked out front.)
Despite my non-use of plastic bags and paper towels, there are plenty of other products I toss in the trash.
But I value the thoughtfulness and desire to understand the issue. Being aware of environmental impact is a step forward and allows me to make a conscious decision to cut down on what I can.
Right now I'm talking just about the waste that pollutes our planet and gets hauled out to the curb where we want to think it "magically" disappears. This is the wasteful society we've adapted to living in. It's a mind set where people feel entitled to doing things the way they want to and using the products they want to when a simple alternative would be less harsh on the environment. America is in love with her bad habits.
I've lived in a few environmentally-aware communities over the years and have developed habits that now come naturally to me. So natural that when I see other alternate practices I've since turned from, it makes me cringe. Sometimes, it makes me angry.
Here are a few examples.
To me, it just makes sense not to use paper products. I keep drawers of towels and rags on hand for different purposes. When my family wipes our hands, we use a towel. When you make a spill, you grab a rag. When I clean, I use an old t-shirt. Paper towels don't exist in my world. Because they aren't necessary.
I know it's a big step for most moms, but I've transitioned to mostly using cloth diapers and using washable wipes on the baby. I feel better about the decision and don't feel it's any more work, and saves us a lot of money every month. Besides, I never run out!
I don't take shopping bags. One of my good friends gifted me with a purse-size bag full of re-usable shopping bags. The product is genius and always on hand so I don't forget at the check-out line. What I find exceptionally irritating though is when I hand one over to a chashier and she proceeds to THROW AWAY the bag I'd be saving. There are items like meat products that I bag in plastic, or times a plastic bag will make it home with me. These are used as garbage liners, pet waste recepticles, and for dirty diapers on the go.
While I applaud the efforts of so many people who recycle religiously, or not so frequently, recycling just isn't the "end all." It's time to take a closer look at the waste in our lives. Recycling is just a small attempt to solve our waste issue. What we need to evaluate are those tricky little habits of convenience that wreak havoc on our planet and continue to be dumped into our landfills.
That's not to assume I see myself as in any way superior. I certainly still have a lot of things I could do differently.
I love my car just as much as the next person. I don't think twice about hopping behind the wheel for the slightest reason and zipping around town. I'm not ready to give up my daily drives or my SUV that's far from low emissions.
Unlike the neighbors, our house doesn't have solar panels. We don't raise our own chickens. Right now we don't even have a garden. (Yes, these neighbors do have a no emissions vehicle parked out front.)
Despite my non-use of plastic bags and paper towels, there are plenty of other products I toss in the trash.
But I value the thoughtfulness and desire to understand the issue. Being aware of environmental impact is a step forward and allows me to make a conscious decision to cut down on what I can.
Sunday, November 6, 2011
Wednesday, October 26, 2011
Make washable baby wipes-- an easy tutorial
I was recently shopping in a cloth diaper store and came accross some washable baby wipes. They were made from various materials and said you could use them with wipe solution or just spritz with a spray bottle.
They seemed easy enough to make myself so I set out to sew a few to try at home. (I believe retail was around $15 for four?)
Here are the instructions for making the ones above.
What you will need:
A sewing machine
Material (I used old burp cloths. It needs to be soft but absorbant.)
Scissors
I found a small square box and traced around it as my pattern. Then, after trying a few techniques, I stitched two squares together in a zig zag setting on the sewing machine. (May I mention that this was done on probably the coolest antique sewing machine I've ever seen? Our neighbor invited us over to use it-- they're in their 80's-- and found it in Germany. They travelled with it all over Europe by train and brought it back to the states many years ago.)
We tried two ways to stitch the pieces together, one was starting inside out and then finishing it with the seams on the inside, like a pillow. This made it not lay flat though so we simply stitched along the top of the two pieces paired up.
After the first washing, my initial wipes began to fray so we solved this by cutting along the edge of the next set of wipes with pinking shears. It left the edges finished enough that they no longer frayed.
I've tried them on my not-yet-potty-trained two-year old and on my newborn. I like them on my older son for less messy diapers, but I LOVE using them on the newborn. He goes through a lot of diapers during the day and the washable wipes seem less irritating to his skin. They also aren't cold so don't make him cry during changings. We just toss them in a washable bag that hangs by the changing table and put them in with a load of washable diapers.
They seemed easy enough to make myself so I set out to sew a few to try at home. (I believe retail was around $15 for four?)
Here are the instructions for making the ones above.
What you will need:
A sewing machine
Material (I used old burp cloths. It needs to be soft but absorbant.)
Scissors
I found a small square box and traced around it as my pattern. Then, after trying a few techniques, I stitched two squares together in a zig zag setting on the sewing machine. (May I mention that this was done on probably the coolest antique sewing machine I've ever seen? Our neighbor invited us over to use it-- they're in their 80's-- and found it in Germany. They travelled with it all over Europe by train and brought it back to the states many years ago.)
We tried two ways to stitch the pieces together, one was starting inside out and then finishing it with the seams on the inside, like a pillow. This made it not lay flat though so we simply stitched along the top of the two pieces paired up.
After the first washing, my initial wipes began to fray so we solved this by cutting along the edge of the next set of wipes with pinking shears. It left the edges finished enough that they no longer frayed.
I've tried them on my not-yet-potty-trained two-year old and on my newborn. I like them on my older son for less messy diapers, but I LOVE using them on the newborn. He goes through a lot of diapers during the day and the washable wipes seem less irritating to his skin. They also aren't cold so don't make him cry during changings. We just toss them in a washable bag that hangs by the changing table and put them in with a load of washable diapers.
Saturday, October 22, 2011
Hello big world
I decided to take a few minutes this weekend for an impromptu photo shoot. Trevor is getting bigger and stronger every day and has a hardy appetite. He's a momma's boy, but that's just fine with me.
Sunday, October 2, 2011
Off to pick a pumpkin!
Thanks to the Mom's Group for sharing a link to the pumpkin farm! The original plan was to join everyone for a day of hay rides and picking out a pumpkin with the little ones, but with my due date just days away, we decided to go on our own this weekend just in case we couldn't make it to their outing.
The day was filled with tractors, chickens, goats, tractors, hay rides, slides of all sizes, tractors, and... did I mention TRACTORS?? Maddox was more than thrilled.
Friday, September 30, 2011
Wednesday, September 28, 2011
Veggie-packed Quiche
Quiche is a wonderful comfort food, but most recipes are packed with fat and calories. Each fork full typically offers a minimal amount of veggies.
Here's a great recipe for a veggie-packed quiche that tastes fantastic.
Crust:
2 cups flour
1/2 cup butter
pinch salt
fresh ground pepper
5 Tbs cold water
Combine dry ingredients and cut in butter until it resembles coarse crumbs. Stir in water, adding 1 Tbs at a time until it's moist and forms a ball.
Roll out very thin and place in pie plate. Cut off extra edges and crimp. Prick center with a fork and place in oven at 350 degrees for 10 minutes.
Quiche:
1/2 sweet onion, chopped
2 cups chopped fresh spinach or small package frozen, thawed
1/2 cup broccolli, chopped
1/2 cup fresh mushrooms, sliced
1 small zuchinni, sliced into thin quarters
1/2 cup almond milk or skim
2 eggs or egg replacer
1 Tbs thyme
1 Tbs chopped fresh parsley
1 Tbs basil
1/2 tsp chili powder
1/4 cup mozerella or 2 oz goat cheese
Combine all the ingredients by stirring. Spread in pie crust and bake at 350 for 20 minutes or until the top is slightly browned and the middle is firm.
Saturday, September 10, 2011
A day for "Slowcooker Chicken Soup"
After a long, rainy week I began looking for a comfort food that was both easy to make and would keep well for leftovers. That's when I saw a post by Nourished Kitchen for a Slowcooker Chicken Soup recipe. Even the pictures look comforting!
I changed the ingredients slightly to use what I could find, but even so it's filling the house with a tasty aroma.
First, I seasoned two large, organic chicken thighs with sea salt, ground pepper, garlic powder, and dried bay leaves (I preferred whole but did not have any). I then covered the chicken with water and cooked it on low in a pot for a few hours. I then added chopped celery, carrots, and a yellow onion. I continued cooking for a few more hours on low until dinner. Towards the end, I will sprinkle in chopped parsley.
I'm planning on serving this tonight with a crusty loaf of french bread from the organic grocery store.
Bon apetit!
I changed the ingredients slightly to use what I could find, but even so it's filling the house with a tasty aroma.
First, I seasoned two large, organic chicken thighs with sea salt, ground pepper, garlic powder, and dried bay leaves (I preferred whole but did not have any). I then covered the chicken with water and cooked it on low in a pot for a few hours. I then added chopped celery, carrots, and a yellow onion. I continued cooking for a few more hours on low until dinner. Towards the end, I will sprinkle in chopped parsley.
I'm planning on serving this tonight with a crusty loaf of french bread from the organic grocery store.
Bon apetit!
Monday, September 5, 2011
End of Summer at the new house
Maddox has adjusted quickly to the new house. It took a few days to get organized and I wish I had my camera to snap some photos, like when Maddox found a step ladder to pull into the kitchen and eat his breakfast cereal.
I'm sure it helps that we have been resurrecting his old toys to his delight, the ones that have been boxed up for half the week that he sadly watched disappear at the old house. And with more room to play and new places to explore, he's quite happy.
Yesterday we went outside for an impromptu photo shoot. Here is Maddox posing (yes, definitely POSING and saying "cheese") around the yard.
I'm sure it helps that we have been resurrecting his old toys to his delight, the ones that have been boxed up for half the week that he sadly watched disappear at the old house. And with more room to play and new places to explore, he's quite happy.
Yesterday we went outside for an impromptu photo shoot. Here is Maddox posing (yes, definitely POSING and saying "cheese") around the yard.
Sunday, September 4, 2011
Baby room preview: Before and after makeover
We finished the baby room!
Here's a before and after of the new room for our little one. I love how it turned out, especially since I got everything to put it together before we moved in so it was the first time to see how it would look.
Here's the room before...
And here is what it looks like now...
I made the mobile, quilt, and rug which I think gives it a more personal touch.
It's good to be settling in and making the house our own.
Here's a before and after of the new room for our little one. I love how it turned out, especially since I got everything to put it together before we moved in so it was the first time to see how it would look.
Here's the room before...
And here is what it looks like now...
I made the mobile, quilt, and rug which I think gives it a more personal touch.
It's good to be settling in and making the house our own.
Saturday, August 13, 2011
Babies wear suspenders
I recently came across this idea for personalizing a baby onsie by adding suspenders! The idea came from HERE and inspired me to try my hand at some of my own.
I'd love to try applique techniques, but need to find more information to guide my first attempt. What I like about these are that they seem more sturdy than personalized onesies with iron-on designs. Those seem to come loose fairly quickly.
If you have other ideas for making your own onsie, feel free to pass it along.
This one has my version of a bow tie.
For security, I used fabric glue and then double stitched everything. You can never be too careful with wearables that also endure multiple washes.
I'd love to try applique techniques, but need to find more information to guide my first attempt. What I like about these are that they seem more sturdy than personalized onesies with iron-on designs. Those seem to come loose fairly quickly.
If you have other ideas for making your own onsie, feel free to pass it along.
Thursday, August 11, 2011
Discipline: The dirty little word
I can still remember when caring for my son meant simply meeting his day-to-day needs. But somewhere along the way he developed something called a WILL and OPINION about every aspect of life.
Suddenly, my cherbic offspring went from following direction and being easy to passify to an entirely different little human. This child tells me where to sit, what he wants to eat, says 'no' and then changes his mind in a fit of tears, tests my direction (such as "come here", "don't touch", and "be nice to the dogs"), and sometimes decides that our errands for the day are not part of HIS agenda. Some days, the slightest bump in the road will send him spiraling into a meltdown. And yesterday for the first time, he ran in the opposite direction when I tried to steer him to the car. Fortunately, he was not in danger but could have been if we were not in Pat's yard.
And with this new trial and test of my limits comes a new descent into discipline. At home, of course, it's easier. I have two time-out spots, safety, and shelter from the prying eye of the public. And if the situation calls for it, a spatula to use for a swat.
But now that tantrums and outright disobedience is trickling into our public outings, the issue is more complicated. It's not always easy to remove my son from a public place to discipline in private, and sometimes he's crying too hard to talk to. In those times, all I can do is leave where we are and deal with it when we get to the car-- if that's an option.
I do understand that sometimes a meltdown is the result of badly needing a nap. It's every parent's challenge to find their balance between when a tired child's crankiness should be overlooked or faced head-on. I hate being that parent/child in a store that's causing a scene. But I also don't believe in giving into a bad attitude by offering candy or impulsively buying a new toy to try and quiet my unhappy little one.
I know that this is just a time we're going through, and some days I feel more or less capable of handling what he throws my way. But at least I understand that being two means coming to terms with new emotions he's experiencing and trying to find the words to express his thoughts and feelings. I know it's frustrating and I know he understands that no matter what, I love him. And at the end of the day, he's still my best buddy who says goodnight with not one but TWO hugs and a kiss.
And I know that everything will be allright.
Monday, August 8, 2011
Make-it-yourself baby mobile
So last week I gave a little teaser by sharing the fabrics I was using for a new project. After a few test runs, I finally made a mobile for the baby's room. Here's where I got the idea.
The fun patterns certainly caught Maddox's eye and he wants to play with it!
I'm not very skilled with glue, so I sewed the hanging strands around the rim of the mobile by hand. I also added buttons on the bottom circles to help weigh it down and add a little extra cuteness. I toyed with the idea of also putting buttons around the rim of the mobile but decided it would be too much going on.
I plan to hang it up with more brown ribbon, a little chain, and a hook.
Friday, August 5, 2011
Toddlers love velcro blocks
This week I came across an idea for putting velcro on building blocks from Chasing Cheerios. I'm always looking for ways to occupy my busy toddler and blocks are one of his favorite things to play with.
Not only does the velcro allow him to build in new dimensions, but you can always add new shapes to keep their creativity flowing.
When I couldn't find regular building blocks at the craft store, I picked up plain wood square blocks and a bag of wooden spools for $2 each. I then chose red and blue velcro. A small glue gun gave the velcro the sticking power to resist the pull of the velcro, but if you try it make sure the corners are well glued to keep them stuck on tight. A few came loose and needed to be re-glued more securely.
As mothers know, toys like blocks end up scattered all over the room and always end up underfoot. So I found the perfect storage solution with a cute canister on clearance. My little one loves taking the lid on and off and has done a great job keeping his new block set picked up.
Actually, he loves the blocks and canister so much that he won't let me touch them. When I asked if I could see them, Maddox stated very matter-of-factly "No, my blocks!"
"His" blocks were even tucked securely under his arm tonight while watching his Veggie Tales movie (so mom wouldn't put them somewhere) and I'm sure would have gone to bed with him had I allowed it.
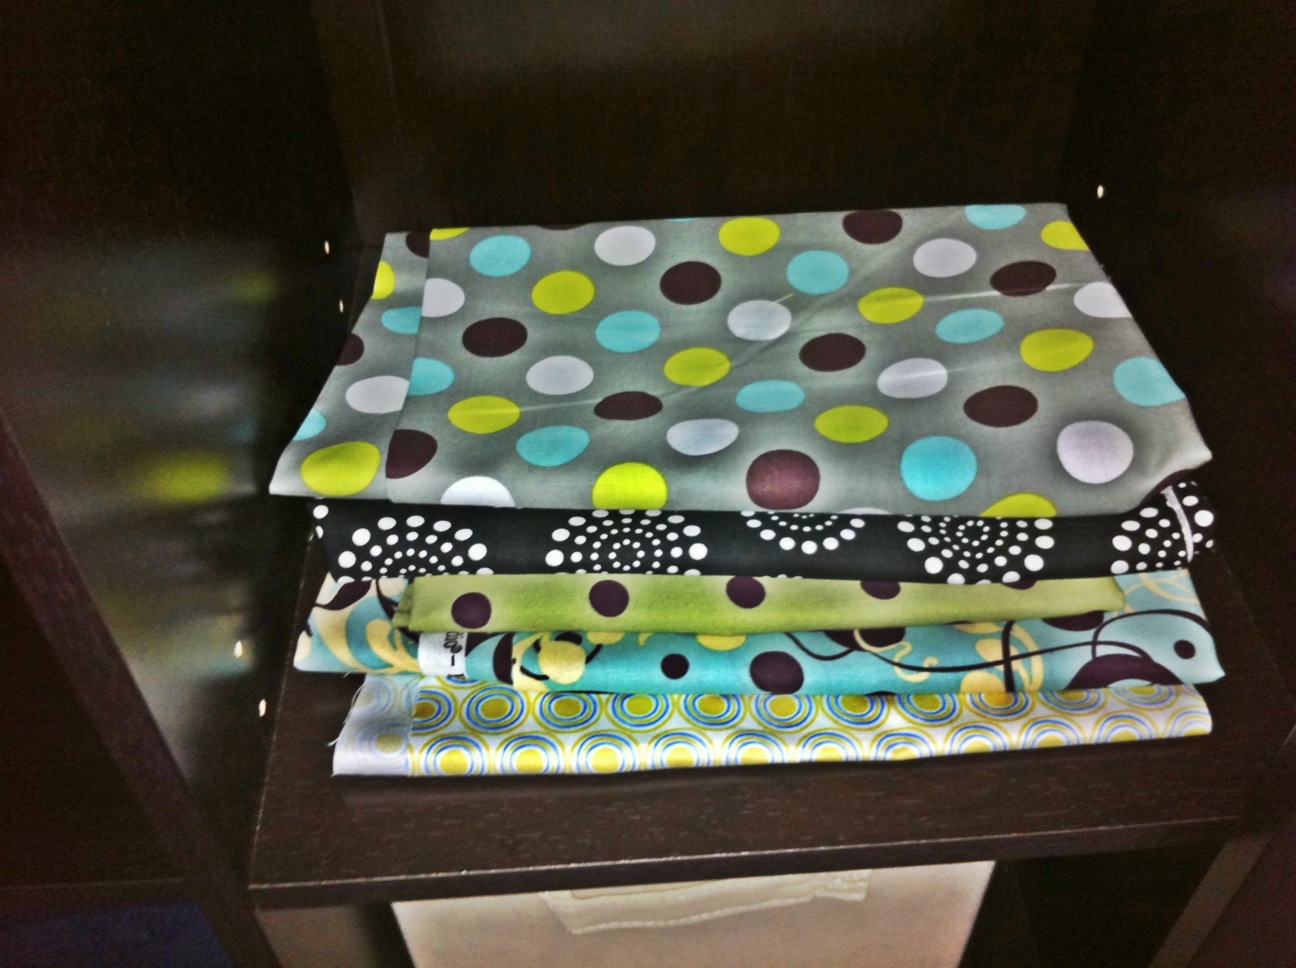
My next project is almost done and will be for the baby. I won't tell you what it is yet, but will give you a peek at the great fabrics I'm using.
Not only does the velcro allow him to build in new dimensions, but you can always add new shapes to keep their creativity flowing.
When I couldn't find regular building blocks at the craft store, I picked up plain wood square blocks and a bag of wooden spools for $2 each. I then chose red and blue velcro. A small glue gun gave the velcro the sticking power to resist the pull of the velcro, but if you try it make sure the corners are well glued to keep them stuck on tight. A few came loose and needed to be re-glued more securely.
As mothers know, toys like blocks end up scattered all over the room and always end up underfoot. So I found the perfect storage solution with a cute canister on clearance. My little one loves taking the lid on and off and has done a great job keeping his new block set picked up.
Actually, he loves the blocks and canister so much that he won't let me touch them. When I asked if I could see them, Maddox stated very matter-of-factly "No, my blocks!"
"His" blocks were even tucked securely under his arm tonight while watching his Veggie Tales movie (so mom wouldn't put them somewhere) and I'm sure would have gone to bed with him had I allowed it.
My next project is almost done and will be for the baby. I won't tell you what it is yet, but will give you a peek at the great fabrics I'm using.
Feeling craft-y? Do-it-yourself artwork
This week has been inspiring. I tackled multiple do-it-yourself projects and crafts that I'll share in the next few posts.
I admit that part of the motivation came from moving/house-shopping stress coupled with the physical and mental drain of weekend trips to Knoxville (this will be my third weekend making the drive and I'll be working on Sunday). The other side to the story is that I've been in tremendous pain this week and keeping busy helps take my mind off of it. The doctors are working hard to help me find some relief, but mostly it's just the unfortunate side of pregnancy symptoms.
Yesterday evening I had a great shopping trip to Hobby Lobby. I almost forgot how much I LOVE that store. The prices are lower that JoAnne's and it's much more convenient to our house.
I found a fantastic roll of fabric for 30% off. I then found this adorable frame for 50% off. By combining the two, I created a great piece of artwork for our bathroom.
And look how well it matches the rest of the bathroom!I am in love with the look so much that I'm considering making a collection of small framed fabrics and mixing in some photographs for the kids room, or framing three other fabrics I love and hanging them over the master bed.
Wednesday, August 3, 2011
Bibs, booties, and... a hand-stitched quilt
The quilt I started is finally done. I love that it incorporates the room colors but isn't so baby-ish that it has to be put away as he grows.
I picked out the fabric for the smaller squares from furniture sample pieces on clearance. The backing is more of a muslin fabric and very soft.
Instead of doing quilting, I decided to add buttons in corresponding blue, green, and cream. And while it doesn't make for a baby-safe quilt, it will be more for decoration anyway. Since it's hand-stiched I'd hate to have to wash it if it got dirty from use. My squares and grid aren't as perfect as I wanted, but I still like how it turned out as a shabby chic handmade project.
Subscribe to:
Posts (Atom)